
Posts by admin:
- Begin by browning the meat. I like to add a little olive oil and a dash of salt to get it going. While it’s browning, chop up the onion, bell pepper, mushrooms and garlic. Drain the fat off of the meat and return to pan. Add the veggies and cook until soft
- Add wine and simmer. Pour in the tomato sauce. Drain the diced tomatoes and add to pan. Mix in Italian seasoning, oregano and salt. Turn heat to low.
- Slice zucchini very thinly and lengthwise. Use a mandolin slicer if you have one. Zucchini can be used instead of noodles for gluten-free lasagna, but I prefer to use both zucchini and noodles. Now is a good time to preheat the oven to 375⁰.
- In each casserole dish, add a layer of the meat and vegetable mixture. Cover the meat with zucchini slices. Spread a little of the premade marinara sauce over the zucchini. Lay a couple handfuls of fresh spinach on top of the marinara and cover with hard lasagna noodles.
- For the dairy-free lasagna, mix one egg with faux sour cream. Pour this mixture over the noodle layer. For the dairy lasagna, mix one egg with real sour cream and pour over the noodles. Then, sprinkle with cheese.
- Start the layers again with the meat and veggie mixture, then zucchini, marinara, spinach and noodles. I stopped after two layers per lasagna. Instead of adding another sour cream layer, I split the remaining meat and veggie mixture between the two lasagnas.
- Thinly slice the fresh tomato and lay the slices as the final layer on the dairy-free lasagna. Cover with some bread crumbs and sprinkle with fresh chopped parsley. For the dairy lasagna, sprinkle with breadcrumbs and cheese, and top with fresh parsley.
- Cover both with foil and bake for 45 minutes. Uncover and let the brown for 5-10 minutes.
- For those who are making only traditional, restriction-free, veggie-packed lasagna, omit the fresh tomato and faux sour cream. Double the real sour cream.
- To make only dairy-free lasagna, exclude the cheese and real sour cream. Double the faux sour cream.
- Vegan eaters can use faux meat; I prefer Yves’ brand meatless ground original. The creamy layer can be omitted which includes sour cream, cheese and egg. Eliminating the creamy layer will not affect the overall flavor. Be sure to use a wheat or rice-based noodle as many are egg-based.
- For gluten-free lasagna, omit the breadcrumbs and fresh tomatoes; top with cheese instead. DeBoles brand rice noodles are oven ready/no boil. Make sure to get regular sour cream instead of light because it can include gluten. Tofutti brand dairy-free sour cream does not contain gluten but it is manufactured in a facility with other products containing gluten – not ideal for the highly sensitive. Read the labels when selecting red wine as some include a wheat ingredient.

- 12 oz. fresh goat cheese; room temperature
- 3 Tbsp. minced fresh basil
- 2 Tbsp. olive oil; more as needed
- Fresh black pepper and sea salt; as needed
- 2 large, firm and tart apples; peeled and cored; sliced 1/8-inch thick
- 6 large slices of prosciutto
- 1/2 cup pecans, crushed
- 1 store-bought or homemade pizza dough ( I used Trader Joe’s Herby dough)
- 2-3 cups fresh arugula
- juice of 1 orange
- juice of 1/2 lemon
- salt and pepper
- olive oil
- Store-bought balsamic glaze
- 6 tablespoons unsalted butter, at room temperature
- 1/2 cup sugar
- 1 cup all purpose flour
- 3/4 cup cornstarch
- 1 teaspoon baking powder
- 1/4 teaspoon salt
- 1 egg
- 1 egg yolk
- 1 teaspoon vanilla extract
- store -bought dulce de leche for filling or homemade (see note)
- powdered sugar for dusting
- 1/2 cup unsalted butter, at room temperature
- 2/3 cup light brown sugar
- 1 egg
- 1 tsp vanilla extract
- 3/4 cup all-purpose flour
- 1/2 tsp baking soda
- 1/2 tsp salt
- 1/2 tsp ground cinnamon
- 1 1/2 cups old-fashioned rolled oats or quickcooking oats
- 2/3 cup raisins
- 1-2/3 cup all purpose flour
- 1/2 cup unsweetened good quality cocoa powder
- 1-1/2 teaspoon baking powder
- pinch of salt
- 3/4 cup slivered almonds (optional)
- 1/4 cup Earth Balance margarine, softened
- 3/4 cup superfine sugar
- 2 flax seed “eggs” or 2 large eggs
- –to prepare flax seed “eggs”: 2 Tbsp flax seed meal + 6 Tbsp water–set aside for 3 minutes
- White chocolate chips
- 6 candy canes (crushed)
{Guest Post} How to Make A Veggie-Packed Lasagna
December 20th, 2012I have a guest post today! I am on vacation so even though I am not great about planning timed posts or posts ahead of time, it was great when Tali volunteered to be a guest poster on Opera Singer in the Kitchen.
This post was written by Tali Wee who currently lives in Seattle and blogs about life in the northwest. She owns Wee Picket Fences where she writes about being a new homeowner, bargain hunter, foodie and DIY enthusiast. Tali works at Zillow where she handles the community outreach for Charlotte, NC. She enjoys family, food, travel, writing and spending time on projects around the house.
Check out her bio to learn about she and her husband’s lives. While she eat dairy-free her husband does not but she is familiar with gluten-free and vegan restrictions. I love her recipe and will have to try the lasagna when I get back home.
Thanks Tami for posting!
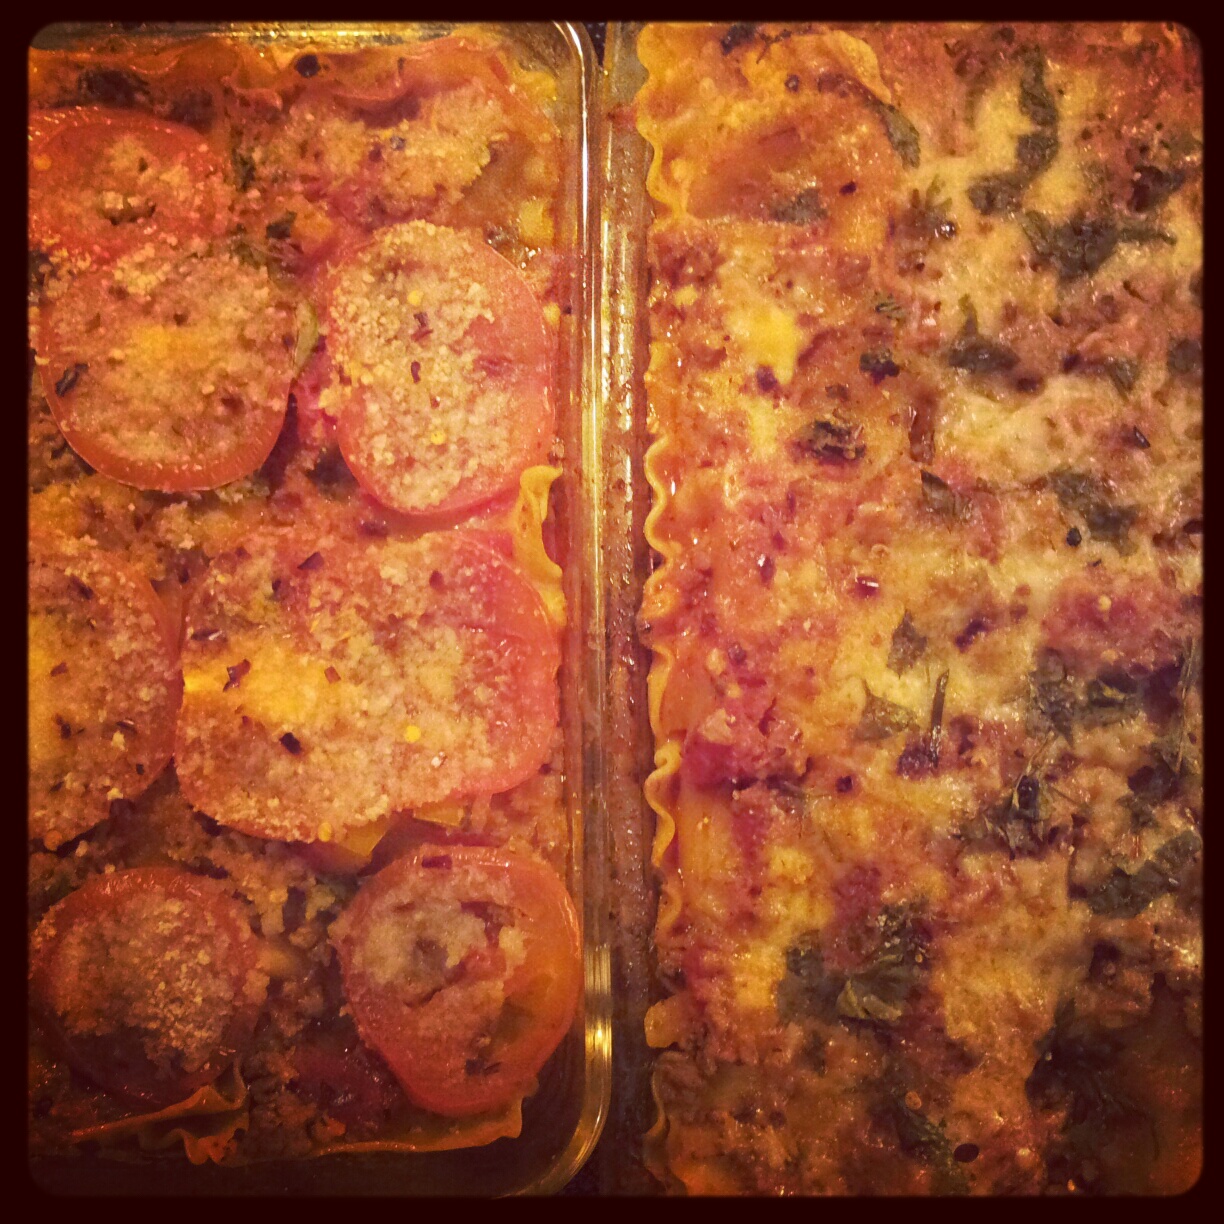
How to Make A Veggie-Packed Lasagna
28 oz. jar prepared marinara sauce
14 oz. can diced tomatoes
1 white onion, diced
1 bell pepper, diced (I prefer red or orange)
8 oz. button mushrooms, diced
5 medium sized zucchinis, thinly sliced lengthwise
3 cups fresh spinach
1 tomato, sliced thinly
4 cloves garlic, crushed
½ cup fresh Italian parsley, minced
1 Tablespoon Italian seasoning
2 teaspoons dried oregano
1 teaspoon salt
2 lbs. ground beef or turkey
½ lb. Italian sausage
2 eggs
½ cup sour cream
1 cup grated parmesan and mozzarella cheese mixture
1 cup breadcrumbs
1 box oven-ready, no boil lasagna noodles
1 cup red wine (Some red wines are made with a wheat-based clarifying agent.)
½ cup Tofutti brand Sour Supreme (This is dairy-free sour cream. It does not contain gluten but is manufactured around gluten and can cause a reaction for those who are highly sensitive.)



Sharing is Caring!

Fresh Goat Cheese, Apple, Prosciutto, Pecan Pizza with Balsamic Glaze
December 12th, 2012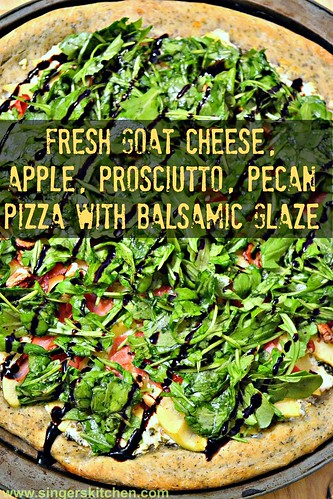
I thought I would bring you something savory this week to give everyone a break from all the sweets. I know we all have to plan dinner in between all our baking. When it comes to making dinner I am looking for quick yet tasty entrees.
During the time my sister and brother-in-law stayed with us, which was for 6 weeks, I prepared a variety of meals. Their first meal I prepared for them were my Cornbread-Stuffed Poblano Peppers. After my brother-in-law finished he asked Ryan if this was the way they were going to eat every night. He thought my meal was fancy and gourmet. I was definitely flattered.
Ryan just told him that we ate like this all the time and that it was really nothing fancy but always yummy food. 🙂 It is always nice to hear something nice like that.
But really, you really do not have to SLAVE in the kitchen to have a fancy gourmet meal. Since I am nearing the end of my pregnancy (I am 7 months now) the last thing I want to be doing is cooking for a long time. I actually did not feel like cooking that much in my last pregnancy but I am quite enjoying it this time. Of course, like I said, the meals have to be quick and based on what I have in my pantry and fridge.
I find myself wanting meat and potatoes all the time but what fun is there in that? So how did this pizza come to fruition? I enjoy reading Simply Life blog. She writes about her life and travels and includes lots of giveaways and great recipes at the same time!
When I saw her recipe for her Apple, Pecan, and Goat Cheese Pizza, I knew I had to make some version of it based on what I had in my fridge. I found My Life Runs on Food and their pizza recipe and meshed the two recipes to make my own.
Sound complicated? Check out how I prepared it:
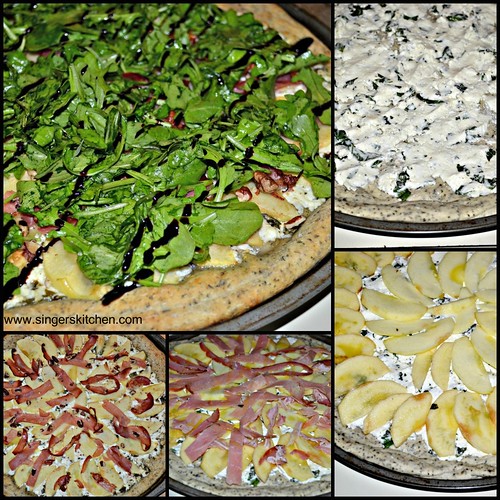
It is an easy assembly as well as a quick bake time. Sometimes our toddler is hungrier than we are prepared for so she eats first and plays and then we put her down for the night. It is not always the case but our little one has been teething the last few nights so everything has been moving up a little earlier, which meant a late dinner but a quick prep and baking time! Just what this mother ordered.
The goat cheese is mixed with olive oil, salt, pepper, and fresh basil and placed as the pizza base. I then layer the apples and spread the chopped prosciutto on top. BAKE!
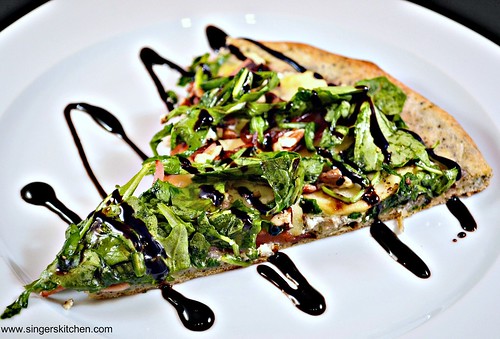
After the pizza is baked I then sprinkle with crushed pecans and the arugula salad and drizzle with balsamic glaze. It was two-for-one meal. Salad and pizza and it was fabulous.
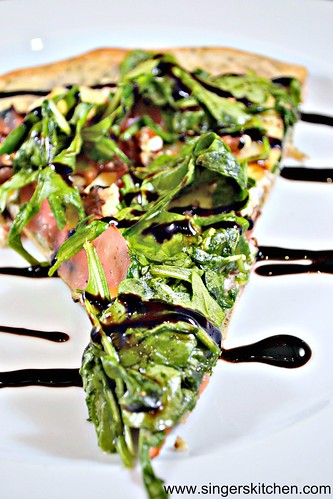
The combination of ingredients in the recipe may sound a little overwhelming but in fact it was SO DELICIOUS! My husband said he could have this pizza often and again.
Make it tonight! I promise your family will thank you for it!

BY the way, check out this AWESOME giveaway! This lady worked on my site and I love it!

Sharing is Caring!

Alfajores and Oatmeal Raisin Cookies from The Cookiepedia {Review + Giveaway}
December 11th, 2012
More baking!! I am loving it and I hope you are getting in some too! A few weeks ago Quirk Books sent me a few cookbooks to look through and I feel in love with Cookiepedia. Do you have trouble deciding what to make every year and you get stuck making the SAME cookies every year? I felt that way this year even though I did express that I hardly baked last year. It still counts
I perused through the cookbook and stood in the kitchen for a while trying to decide what to make first. Ha! The cookbook focuses on reinventing the classic cookie so I decided to make a classic and a fancy cookie.
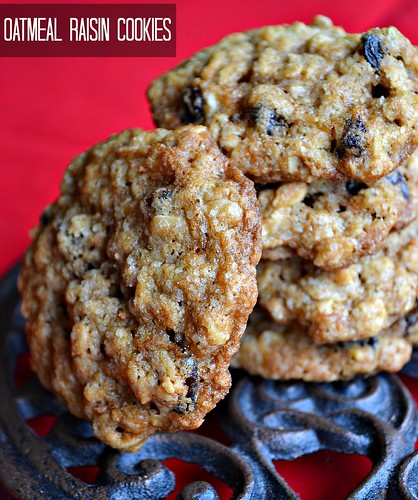
One of my husband’s favorite cookies happen to be Oatmeal Raisin so I went with that recipe. The recipe gives you the option for add-ins, like chocolate chips, nuts, etc, but I decided to keep them as is. A note was placed on the recipe stating that refrigerating the dough before baking would make for a taller and chewier cookie, so I went with that recommendation.
Since we moved to our new place it is always hard to get used to your new appliances. While they might not be NEW, they are new to your life. Such is the case with our oven. I believe my oven bakes a little hotter than usual so I have to keep an eye or cook things a little less time that specified. I know I can get this fixed.
I first cooked them a little longer thinking they did not look cooked enough, only to find out that they got a little crunchy. 🙁 Luckily I had a second batch of cookies and I baked them at the lowest time recommended and they came out PERFECTLY! Chewy and delicious. Even Ryan liked them.

What about these beauties? They look perfect for Christmas since they are dusted with powdered sugar. The description read: “A cross between a shortbread and snickerdoodle cookie.” Yes please! Since I had dulce de leche left from my Boozy Cake, I decided I definitely needed to make this recipe.
The dough requires refrigeration twice but in essence this recipe is SUPER quick. Even though there is an option to use store-bought dulce de leche, you can make your own crock-pot dulce de leche. These cookies are quite popular in South America even though they originated in Spain. These would be perfect to make with your kids too!


Want a chance to win ONE of these fabulous cookbooks? Quirk Books was generous enough to offer TWO of my readers a chance to win one of these books.
Use the entry form below. The contest is open to US and Canadian readers.

Sharing is Caring!

White Chocolate and Candy Cane Dipped Almond Biscotti
December 10th, 2012

Last year I made Chocolate Pistachio Biscotti and really liked it but I decided to change up the recipe and go a little more festive. I had a bag of white chocolate chips and a box of candy canes ready to be utilized. Even though there was going to be a crunchy factor with the candy canes I still wanted my biscotti to have some sort of nut.


It is a family tradition to bake several varieties of cookies and while I explained last year how I hardly had time with a new baby and all, this year it is a lot easier. As I bake, Julianne LOVES being in the kitchen. Sometimes she will sit in her high chair and play with her toys as she watches me. At other times she rather sit up higher and be REALLY involved with mommy.
I am training a future baker!
At other times, Julianne is taking out pots, pans, wooden spoons, and measuring cups. I just love the fact she wants to be near her mommy. I believe the clingy stage might be over. Hmm.

Make these for special loved ones or for an upcoming party. They will not disappoint!
White Chocolate and Candy Cane Dipped Almond Biscotti

Sharing is Caring!

A Longwood Christmas Experience
December 9th, 2012




The idea of walking around these beautiful grounds than staying in a car and looking at homes lighted up just pales in comparison. The time it took to make the even look so perfect too hours of work but it is worth it when the Longwood Gardens boasts more than 300,000 visitors to visit during this special time.

A Longwood Christmas runs from November 22, 2012 through January 6, 2013. This gives plenty of time for locals and members to come any time they want. If one happens to be a member of the gardens there is a special day called Member Mondays where members visit during 5-9pm and receive 20% discounts in the Garden Shop and The Terrace.
On December 10th and 17th starting at 5pm there is going to be a special Garden Pass Member-only Holiday evening, which means ONLY these members will be able to attend. Skip the crowds!


Timed tickets are required and can be purchased ahead of time and even purchased online at tickets.longwoodgardens.org. Once the tickets are purchased and you arrive, you and your family can stay as long as you want.
You can also save time by attending on Non-Peak Days which means fewer crowds except during Christmas and New Year’s week. A lot of walking is required so comfortable shoes and clothing is recommended.

My sister and brother-in-law had a blast especially with taking pictures. There are a half a million lights, a ton of handcrafted ornaments and gorgeously decorated Conservatory with a fun Christmas route.

We cannot wait to get back to these gardens because my husband has YET to see this spectacular event. If you want to know more about being a member check out the General Membership Levels that Longwood Gardens has to offer. There is something for everyone. Check out all the performances for the season as well.
Remember to come during non-peak days which are Mondays thru Fridays. Saturday and Sunday will be the highest peak days so leave it to the visitors. 🙂

