Posts by admin:
- 1 1/2 cups fresh rhubarb, diced
- 3/4 cup raw sugar
- 1/2 cup water
- 1 Tablespoon orange zest
- 1 teaspoon ground cinnamon
- 1 1/2 cups whole wheat white flour
- 1/2 cup mesquite powder or flour (Navitas Naturals)*
- 1 teaspoon baking soda
- 1 teaspoon baking powder
- pinch of salt
- 2 flax "eggs" (2 Tablespoons flax seed meal + 6 Tablespoons warm water)
- 1 6-ounce So Delicious Greek-Style vanilla yogurt (or you could use what is in stores)
- 1/4 cup So Delicious Coconut milk
- 1/2 cup Earth Balance margarine, melted
- 1 cup raw sugar
- 1 teaspoon vanilla extract
- *If you do not have mesquite, just use 2 cups of flour
- 3/4 cup rhubarb compote
- 1/2 cup pecans, chopped
- 1/4 cup raw sugar
- 1/2 cup pecans, chopped
- 1/4 cup raw sugar
- 1/4 teaspoon cinnamon
- In a medium pot, add all ingredients over medium heat and cook rhubarb for 30 minutes, or until the rhubarb is mushy and cooked.
- Mix well. Set aside.
- Mix well. Set aside.
- Preheat oven to 350 degrees Fahrenheit.
- Prepare your flax "eggs" and set aside for 5 minutes. Mix the melted Earth Balance with the raw sugar and add the flax "eggs" and the vanilla and mix well.
- Sift the flour and mesquite in a medium bowl and add the baking flour, soda, and salt.
- Add the wet ingredients to the dry ingredients in addition to the coconut yogurt and milk.
- Fold ingredients until well mixed.
- Divide the batter and pour into a greased 9x9 glass dish.
- Add filling on top of the batter and cover with the remaining batter.
- Sprinkle with the topping and bake for 45-55 minutes, until the center comes out clean.

- Google Reader
- by email–subscribe on the right
- Blog about giveaway
- Post on your Facebook wall
- Tweet the following: Check out this summer sweet corn soup #recipe and immersion blender #giveaway by @singerinkitchen #win http://bit.ly/p4rW6O
-
In a food processor, add the flour, sugar and salt and process for a few seconds until combined. Add the margarine and the shortening until the mixture resembles wet sand. Add the water until the dough comes together. Remove from the processor and pat dough into an 11-inch tart pan. Bake the crust for 20 minutes or until lightly golden brown. Remove from oven and cool completely.
-
In a medium pot, combine sugar, arrowroot powder, salt and cinnamon. Blend in coconut milk and 1 1/2 cups blueberries. Bring to a boil, stirring and smashing half the berries deliberately (use a potato masher a few swipes if you like). Boil, stirring constantly, until mixture is very thick, a minute or so. Remove from heat and stir in vanilla extract, margarine, orange juice and orange zest. Cool. (I added the author’s original note on how to cool the filling at a quicker rate)
-
A quick way to cool the filling before adding the rest of the blueberries is to fill a large salad-type bowl with ice and water. Partially submerge the pan with the cooked blueberries in this cold bath, stirring every once in awhile, and in 5 or so minutes it will be sufficiently cooled to continue with your recipe. You can also just set the pan on an unused burner while it cools off, but the cold water bath is much faster and lets you get your pie in the refrigerator more quickly if time is important.
-
Once the filling has cooled, fold in another 1 cup of fresh blueberries into the filling.
-
Pour filling into the cooled tart and top with the rest of the blueberries (1 1/2 cups). Refrigerate a whole day to ensure the tart is thoroughly cooled or overnight if you are tempted to dig into this dessert. (Note:We did, but we found that the dessert tasted the BEST after a WHOLE day of being refrigerated)
Vegan Breakfast Rhubarb Coffee Cake
August 5th, 2011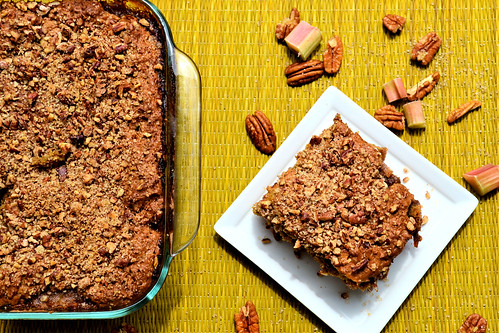
Sometimes it is okay not to have anything planned. It looks like we will be doing leftovers around here. There has been a lot of corn in our week and well, I guess we will finish off the week with it!
We are looking at going to the Buy Michigan Now event in Northville, MI which is a weekend celebration of Michigan-based businesses and Michigan-made products. How neat is that? I feel it is important to know what your state produces and try as hard to support it.
Besides that, it will be the regular weekend, doing laundry and making more room in our duplex for baby.
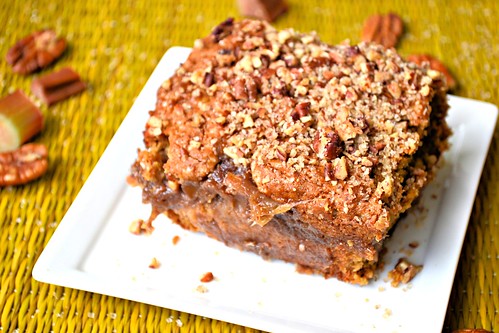
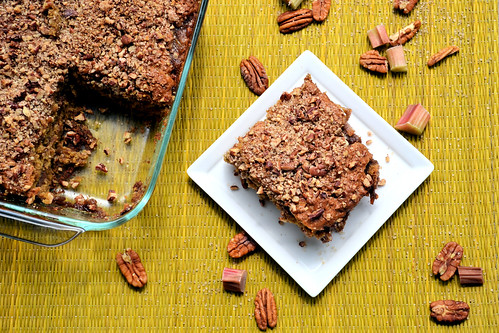
I finally used all the rhubarb I had to make a coffee cake. It was VERY hard trying to decide what to make with this delightful vegetable. It has a lot of fiber and is very healthy so I tried to make a healthy recipe.
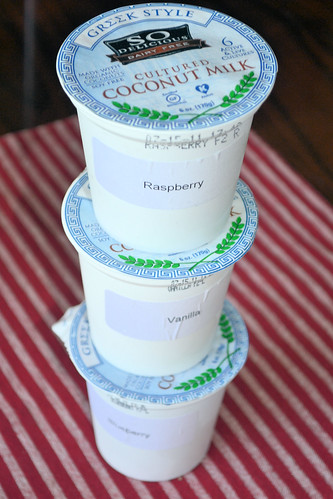
I recently was sent some samples from So Delicious to try their NEW Greek-style coconut yogurt. I received raspberry, blueberry and the vanilla flavor. It was real creamy, thick and VERY delicious, very different than the yogurts they have on the shelf right now.
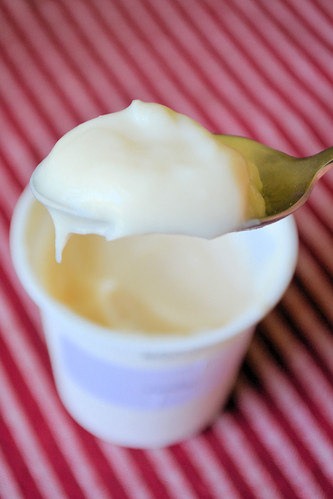
These are not on the shelf yet but I can’t wait to get my hands on the plain yogurt so I can make tzatziki sauce or other sauces make with dairy. I took advantage of using the vanilla yogurt in my coffee cake to substitute for the sour cream it asked for. Did it work? Of course!!!
I also was sent some samples from Navitas Naturals and I finally put my Mesquite powder to use.

Ingredients
Instructions

Sharing is Caring!

Cornbread-Stuffed Poblano Peppers with Salsa Verde
August 4th, 2011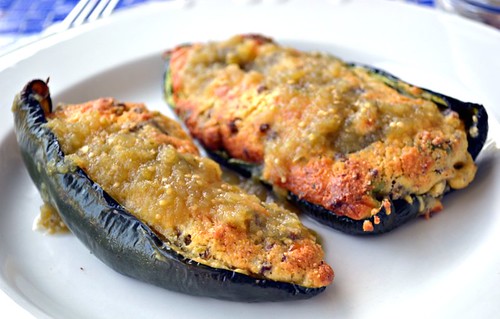
Yesterday proved to another warm day so I was determined to have dinner be quick and ready before dinnertime. I knew I was going to an afternoon Zumba class so I wanted the food to be ready by the time I got home.
This is not a new recipe for us in our home. I know I have mentioned in the past that if Ryan does not request for certain memorable dishes I will forget to make them even if they are in my recipe box.
When it comes to peppers, Ryan really enjoys eating poblano peppers. He requests them when he orders fajitas at any restaurant if they offer them. Green peppers do not seem to sit well in our tummies so we BOTH prefer poblanos or the colored peppers. Anyone else with me?
What I learned recently of course was that poblano peppers are in the same family as jalapeno peppers that is whyu some times the spice factor can vary.
Did I apply this when cleaning the peppers yesterday? I do not particularly like working with latex gloves but when I work with jalapeno peppers I never really have any issues but with poblano peppers it is another story. I think since getting pregnant my skin has been super sensitive to even the outside skin of the poblano pepper.
Yesterday, after working VERY carefully (so I thought) with the peppers, I discarded the seeds and stem in the trash. I washed the peppers and dried them, ready to be filled. I made the cornbread stuffing and then continued on with my day.
My hands started burning and somehow I had scratched my cheek and nose and those were burning. What the heck??? I washed my hands and thought the nightmare was over. 2 hours later I went to put my contacts on and OH MY GOODNESS, pain beyond my understanding shot through my eye. My finger had not even TOUCHED my eye but somehow I was still dealing with pepper fumes. I do not understand it. I flushed milk on my face, washed it and flushed my eyes with milk. Sounds wild but it worked after 5 minutes!!
Anyone else dealt with this? I am using gloves next time no matter what or I might just get one of these handy tools that a Twitter gal suggested. Anyone have one of these? It is called a Pepper Shark and looks really handy!

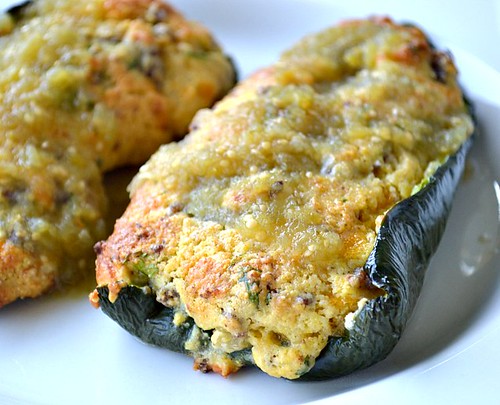
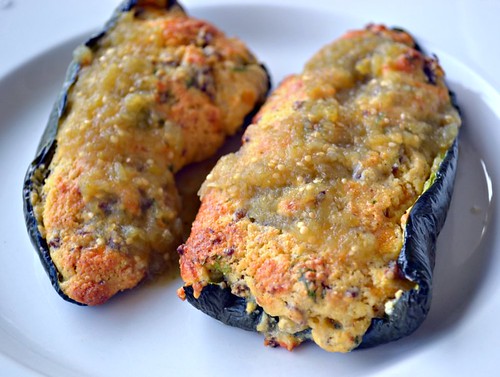
Don’t forget to enter my Immersion Blender Giveaway HERE!
Sharing is Caring!

Summer Sweet Corn Soup with Fresh Basil Oil Drizzle + GIVEAWAY
August 2nd, 2011
My meal planning has come off to a great start! I am so not one to menu plan because I like cooking on the whim, but ever since I got pregnant, if I do not have an idea of what I want to eat, then I feel like eating out and not cooking at all. This is not so good on our budget.
We try eating out once a week to stay within our budget so I told Ryan I would make sure I planned meals for the month of August so that we would not stray away from our budget. It feels so empowering to have things planned. It sounds crazy that I had not done it before, but if I could make meals from looking at what all we had in our fridge and pantry why SHOULD have I planned. I wing things pretty well in the kitchen most of the time.
What about if I do not feel like making what I planned on my calendar this month? Well, I hope I can switch out with another meal that sounds appealing for that day. It works wonders for this pregnant lady.
What was planned for this evening? Well, what is in season right now? Sweet Michigan corn is being highlighted at the markets and at a good price too! Last week I took advantage of using my birthday present Ryan gave me back in March by going to a cooking class. Le Chat Gourmet is a great cooking school for beginners to serious foodies and it is all hands-on. I was looking forward to it!
The class I chose to take was using all in-season ingredients. Of course, none of the classes the owner offered were not focused on vegan foods but I there was one dish I embraced and looked forward making for Ryan when I got back home. It was amazing how quick and easy it was to prepare this dish but how gourmet it tasted. The chef added poached lobster which I did not eat and decided that this dish was delicious without it. Many in the class claimed it would be great as a meal in its entirety.

I prepared the soup it in my nice red Dutch oven pot and cut up 4 ears of fresh sweet corn. There is really nothing like FRESH corn! You know what was the plus to this dish? The fresh basil oil drizzle. Everything is completed so quickly by using an immersion blender. Forget having a blender, but using an immersion blender directly blends foods in their pot or the container that comes with the hand blender.

My basil plant was used to make this fresh drizzle. The oil and basil are warmed over the stove and then the ingredients are blended and drizzled on the soup. YUM! Add some fresh rustic Italian bread and dinner is served.

Thanks to Denene Vincent for a wonderful recipe! But wait! I want you all to have a chance to have your own immersion blender. You can make all kind of sauces and blend your own soups directly in the pot by having this handy blender.

How can you win this? Check out my recipe and then enter below for a chance to win this great appliance, courtesy of Opera Singer in the Kitchen.


Giveaway only open to US residents! (sorry)
How to win an immersion blender: {required}
(leave a comment)
Extra entries:
Follow Opera Singer in the Kitchen on (leave a comment for each)
You have until Tuesday, August 9th at midnight, EST to enter. Have fun and send your friends!

Sharing is Caring!

Chilled Blueberry Tart and 28 weeks!
August 1st, 2011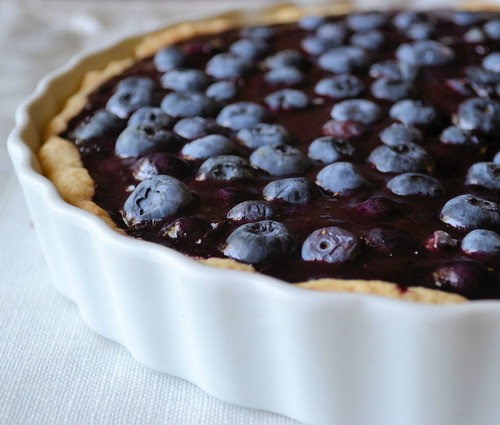
Thank you everyone for your comments and support on my last post. Being pregnant has been an interesting transition and very different than I imagined but I have no regrets. I am enjoying it more now that I am not going through morning sickness too!
I am finally in my 3rd trimester and I am feeling very pregnant all of a sudden. I mean, I know I started getting a belly, but now it seems like it is THERE. It sounds funny even as I reread that sentence but it is how I feel. I noticed today after I came back from church that I started waddling more. I could feel myself waddling last Wednesday after 45 minutes of Zumba so I kind of understood that. I guess it comes with this 3rd trimester, eh?
I have been feeling hotter lately too! Not only is the heat unbearable at times, but I am hot all the time. We only have one A/C window unit in our bedroom so that will be the coolest room in our duplex. We have to have 2-3 fans set up in the rest of the place to TRY to cool the duplex. Some days it just does not do enough. I find myself being the only one uncovered in the mornings after having the A/C running the whole night and Ryan is all wrapped up. Hello body temp!
This too shall pass. That is all I have to say about that! 🙂
![Noelle_and_Ryan,_July_31,_2011[1]](http://farm7.static.flickr.com/6142/5998801746_25f167b0ee.jpg)
Ryan and I were able to take some photos after church just because we were all dressed up and it was not too hot to pose. I wanted to document a picture in my 3rd trimester and in my new dress. Do you like it? It is probably one of the lightest dresses I have worn and it was perfect for this hot day.

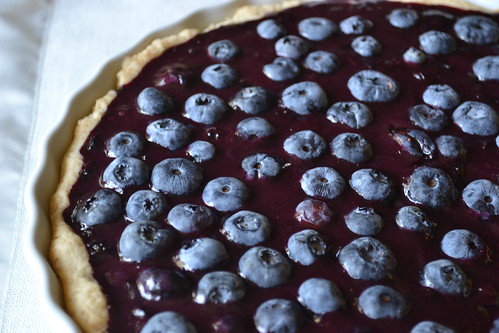
You know what else is perfect for hot summer days? Fresh blueberry tarts. I finally used up the last half of the picked blueberries I had NOT frozen to make this dessert. I found the recipe through Pinterest and I knew it was calling my name. Anyone else on there? Let’s follow each other!
We are on day 3 of eating this tart and I have to say that the longer it is in the fridge the BETTER it tastes so I am going to command you to make this recipe and WAIT a full day before cutting into it. You will not regret it at all. Ryan keeps on raving about how this is probably his favorite fresh fruit tart, despite the fact he continues calling it a pie.

I made several changes to the recipe to make it more a tart than a pie just because it seemed as though the filling would be too dense for a pie. I also substituted the water for So Delicious coconut milk to give more body to the filling. The citrus was changed from lemon to orange and I used arrowroot powder for the thickening agent. The tart crust is thicker and vegan and by FAR my favorite crust. Ryan told me I must stick to that recipe for all pies and tarts from now on. I agree.
Sharing is Caring!

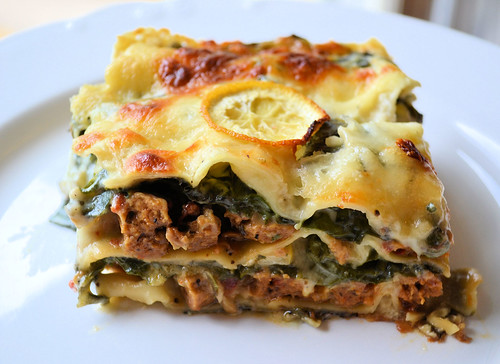
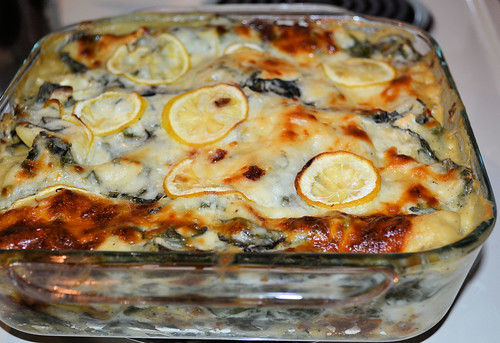
Vegetarian Delight: Veggie Sausage, Chard, and Lemon Lasagna
July 28th, 2011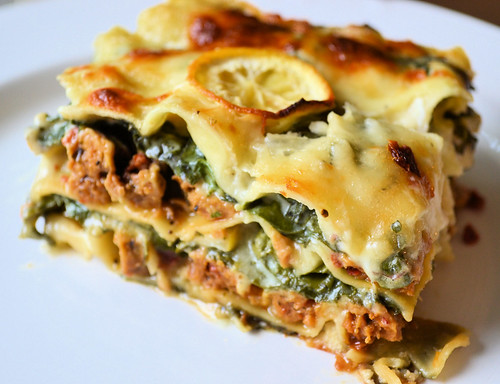
How can sausage be vegetarian? I know that is the first thing you must thinking. Well, you use Tofurky sausage that is all vegan, that is how!
I preface my blog post today by telling you how much different I have been eating since getting pregnant. I cannot explain why I have food aversions but all I know is that practically every food substitute I was using while going vegan I have had an aversion to since getting pregnant. I kid you not.
Most people know that I went vegan for HEALTH reasons and personal choice and not for ethical reasons. I stated the fact in the “About me” section, but somehow, I feel like I have lost connection with the vegan community because of the food choices and recipes I have been posting as of late.
I really do not care, but I care enough to state and write about it because it bothers me that I can be judged on my food choices. I know that I am going to try my best to return to my vegan lifestyle after pregnancy but even after that I do not know. I cannot control this but I know that I continue eating healthy and eating as whole foods as possible.
Should this not be the purpose of healthy eating? If I set myself up writing this blog about my journey into veganism it is because I intended to stay vegan not knowing that vegan cheeses, meats, tofu, nutritional yeast, and most substitutes were going to react with my pregnant body. All I know is that I can eat AS healthy as possible for MY BABY’s health and for my own, even if it means incorporating protein by means of eating meat or eggs. I feel fine and I feel energetic. I know I am supplying the protein I need to maintain a healthy pregnancy in addition to taking my pre-natal vitamins.
My energy levels are wonderful and I working out and maintaining great stamina even if I am not at my goal weight. It is what I feed my body that is the most important.
Thank you EVERYONE who continues to support and read this blog. It has definitely been a journey and it continues being one daily!
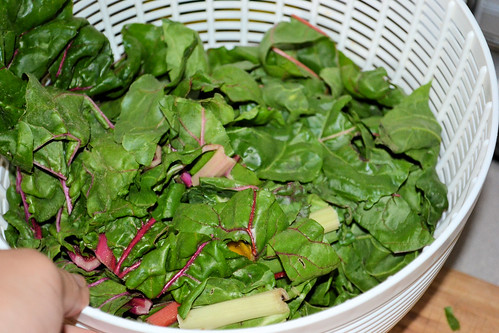
That being said, I really have been wanting to make a lasagna with swiss chard from the farmer’s market but as I kept on thinking about how I could make it vegan, I cringed, knowing I could not tolerate nutritional yeast or Daiya cheese. I literally get nauseous and sick right now, so I decided to make it with dairy products but instead of using sausage I made it with Tofurky sausage.
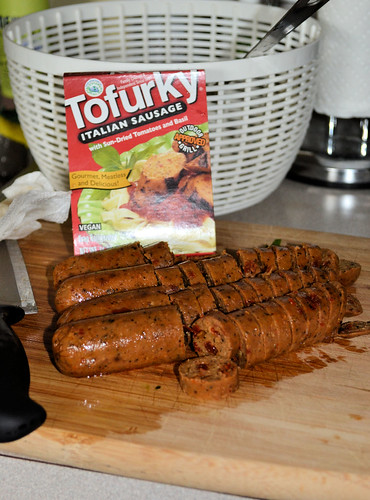
Now for those who are not familiar with Tofurky products this is a meatless sausage made from tofu and vital wheat gluten. I had not eaten it in a while either but I thought I should at least make this dish VEGETARIAN if I could not make it VEGAN.
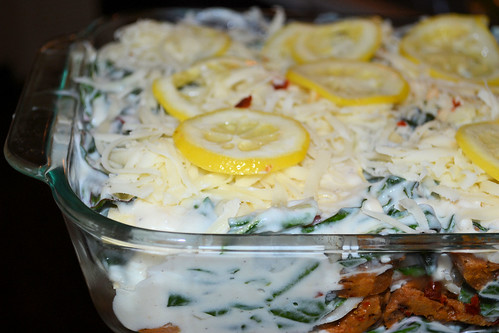
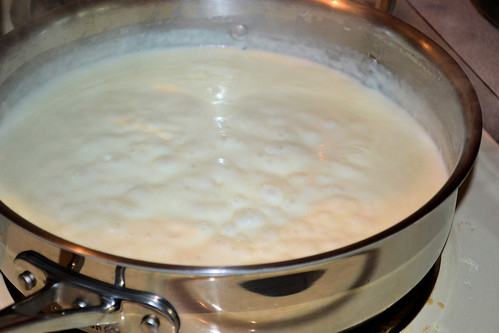
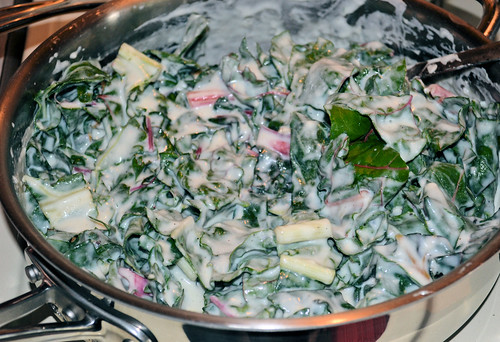
This recipe is VERY quick to prepare and cook and is very delicious. It is definitely a different type of lasagna in that the sauce is a white sauce base and not marinara. It is light and not heavy. Ryan liked it alot! This dish is great to incorporate GREENS. If you do not have swiss chard, try the recipe with kale or spinach.
I accompanied this dinner with a cucumber, red onion, and avocado salad with a balsamic vinagrette. Perfect! I hope you try this dish and if anyone feels so inclined to veganize this dish, go at it!
Make a vegan bechamel sauce and use Daiya cheese. Let me know if you make it that way too!
3 tablespoons Earth Balance margarine

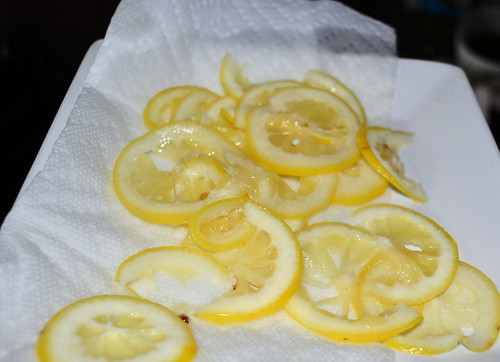
Cover lemon slices with cold water by 3 inches in a saucepan. Bring to a boil. Reduce heat; simmer for 7 minutes. Transfer to a paper-towel-lined plate using a slotted spoon.